Exocad Exoplan V3.1 Build 2026 (Advanced Dental Implant Planning Software) Free Trial Available
Summary
Exocad Exoplan is a professional dental implant planning software designed for oral surgeons, prosthodontists, general dentists, and dental laboratory technicians. Unlike general medical imaging viewers that require manual segmentation and measurement, Exoplan provides a complete digital workflow for implant planning, surgical guide design, and prosthetic-driven restoration planning.
The software is built on the exocad platform, making it vendor-neutral and compatible with most 3D scanners, 3D printers, milling machines, and implant systems. It solves the critical problem of placing implants in the correct position, angle, and depth to ensure prosthetic success and long-term stability.
Exoplan is famous in the dental industry for its open architecture. Unlike implant planning tools locked to specific implant brands or hardware, it works with over 200 implant systems including Straumann, Zimmer, Camlog, Dentsply Sirona, and many local manufacturers. The software integrates seamlessly with exocad DentalCAD for restorative design.
Beginner Guidance
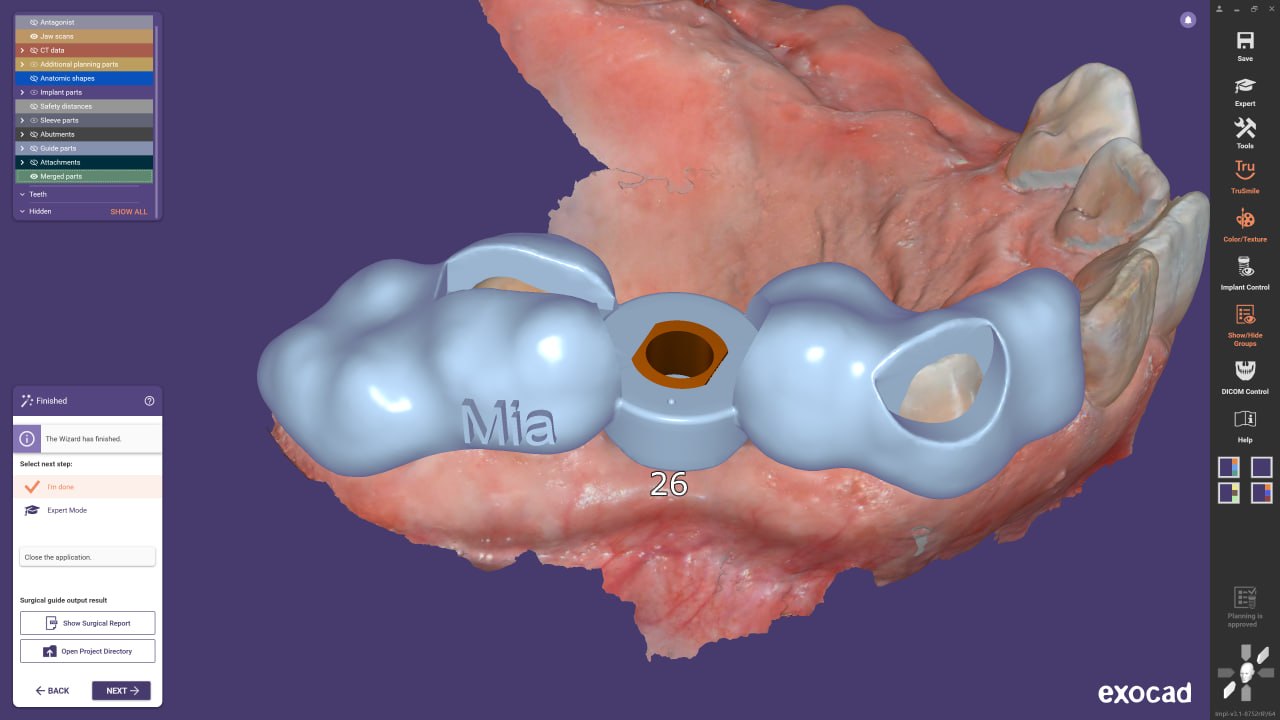
If you are new to Exoplan, start with the wizard-based planning mode. This guides you through each step: importing DICOM data, segmentation, nerve detection, implant selection, positioning, and guide design.
1. First-Time Setup
It requires a Windows PC (Windows 10 or 11, 64-bit). A dedicated GPU is recommended for fast 3D rendering. The software is licensed via annual subscription. Installation includes the main Exoplan application, implant libraries, and integration with exocad DentalCAD if installed.
2. Interface Understanding
The Exoplan interface has four main areas. The 3D viewport displays the patient’s anatomy from CBCT data. The 2D views show axial, sagittal, and coronal slices. The implant library panel contains available implant systems and components. The planning panel shows the current plan including implant positions, angles, depths, and prosthetic components.
For beginners, start by loading a CBCT data set (DICOM files). The software automatically reconstructs the 3D volume. Use the nerve detection tool to identify the inferior alveolar nerve (mandible) and sinus boundaries (maxilla). This is critical for safety.
3. Starting Workflow
-
Import DICOM files from CBCT scanner
-
Adjust window/level settings for optimal bone visualization
-
Run nerve detection and segmentation
-
Select implant system from the library
-
Place first implant using prosthetic-driven approach
-
Add additional implants (up to full arch)
-
Design surgical guide
-
Export guide for 3D printing or milling
4. Common Beginner Mistakes
-
Placing implants too close to the inferior alveolar nerve (less than 2mm safety margin)
-
Ignoring prosthetic-driven planning (starting with bone instead of final restoration)
-
Not verifying implant parallelism for multi-unit restorations
-
Selecting incorrect sleeve height for surgical guide
Workflow Explanation
It follows a prosthetic-driven workflow. The final restoration dictates implant position, not the available bone.
Step 1: Data Import and Visualization
Load DICOM files. Exoplan processes large CBCT datasets quickly using optimized algorithms. The software displays axial, sagittal, and coronal views simultaneously. Adjust brightness and contrast to visualize bone clearly.
Step 2: Anatomical Segmentation
Run automatic nerve detection. The software highlights the inferior alveolar nerve canal in color. Adjust the detected path if needed. Identify maxillary sinus boundaries and tooth roots.
Step 3: Prosthetic Setup
For a single tooth replacement, load the crown STL file from exocad DentalCAD. Position the virtual tooth in the correct location. For full arch cases, load the diagnostic wax-up or denture scan.
Step 4: Implant Selection
Select implant system and specific implant size. The library includes diameter, length, and connection type. It checks compatibility with prosthetic components.
Step 5: Implant Placement
Position the implant based on the prosthetic tooth position, not just available bone. It displays bone density in color overlay. Adjust angle, depth, and mesiodistal position. The software checks proximity to nerves, adjacent teeth, and other implants.
Step 6: Surgical Guide Design
Add guide sleeves to the plan. It automatically determines sleeve height based on implant depth. Add anchor pins for guide stabilization. Export the guide design as STL for 3D printing or milling.
Step 7: Report Generation
Export a surgical report including implant positions, drill sequence, component list, and verification images. Share with the surgical team.
Real Use Cases
1. Single Tooth Implant in Esthetic Zone
A patient missing tooth #8 (upper central incisor). The dentist loads the CBCT and scans a diagnostic wax-up. Exoplan places the virtual tooth in the correct position. The implant is positioned to emerge through the cingulum of the restoration. The surgical guide ensures precise placement within 0.2mm of the plan.
2. Full Arch Immediate Loading
A patient requires full arch fixed restoration on four implants (All-on-4 concept). It plans two straight implants in the anterior and two tilted implants in the posterior to avoid sinus and nerve. The software checks for parallelism between implants. A surgical guide is designed for flapless surgery. Temporary prostheses are designed in exocad DentalCAD and milled pre-operatively.
3. Full Mouth Rehabilitation
A patient with worn dentition requires 10 implants across both arches. It plans implants simultaneously using Instant Anatomic Morphing, which adjusts tooth position based on available bone and prosthetic requirements. The software checks for cross-arch parallelism and component compatibility.
4. Posterior Mandible with Limited Bone Height
A patient has limited vertical bone height above the inferior alveolar nerve. This software places a short implant or plans a sinus lift procedure. The software measures the distance to the nerve and alerts if safety margins are violated.
Project Handling
Exoplan projects are saved as .exo files. A single project can contain one or both arches. For full arch cases, both upper and lower implants are planned in the same project.
The project includes all DICOM data, segmentation masks, implant positions, component selections, guide designs, and notes. Projects can be shared between clinicians and lab technicians.
For multi-case management, it supports batch processing. The project browser displays all recent cases with thumbnails and status indicators.
Export options include STL for surgical guides and models, 3D PDF for patient communication, and surgical reports in Word or PDF formats.
Learning Curve
It has a moderate learning curve for dentists already familiar with implant planning concepts. A new user can plan a single implant case within 1-2 hours of training.
Beginners (2-4 hours): Learn to import DICOM data, navigate 3D views, select implants, position them, and export STL guides.
Intermediate (1-2 days): Learn prosthetic-driven planning, full arch cases, tilted implants, and guide design with multiple sleeves.
Advanced (1 week): Learn complex cases with bone grafting, sinus lifts, simultaneous implant and restoration design, and custom guide modifications.
Exocad offers training courses and certification programs. The user forum is active with exocad support engineers and experienced users answering questions.
Performance Discussion
Speed: Exoplan processes CBCT data quickly. A full jaw DICOM dataset (500 slices) loads in under 10 seconds on a modern workstation. 3D rendering is smooth even with large data sets.
Stability: The software is stable and rarely crashes. Autosave prevents data loss. The 64-bit version can address large memory, preventing out-of-memory errors with high-resolution CBCT data.
Heavy Projects: A full arch case with 6 implants, surgical guide with 8 sleeves, and prosthetic setup uses approximately 1-2GB RAM. Multiple projects can be open simultaneously.
GPU Usage: It uses GPU acceleration for 3D rendering. A dedicated NVIDIA GPU (any model from last 5 years) provides smooth performance. Integrated graphics work but may lag with large DICOM sets.
Workflow Smoothness: The interface is responsive. Zoom, pan, and rotate are instantaneous. Implant positioning updates in real-time in all views simultaneously.
Alternatives to Exoplan
| Software | Key Features | Best For |
|---|---|---|
| Exoplan | Open architecture, exocad integration, 200+ implant libraries | Clinics using exocad, vendor-neutral preference |
| coDiagnostiX | High-end implant planning, bone density analysis | Surgical specialists, complex bone grafting |
| Implant Studio (3Shape) | Integrated with 3Shape TRIOS scanners | Clinics using 3Shape ecosystem |
| BlueSky Plan | Free implant planning | Budget-conscious users, training |
| SimPlant (Dentsply) | Legacy implant planning | Dentsply implant users |
| RealGUIDE | 5-in-1 software (planning, guide design, drilling) | Comprehensive workflow |
Why Choose Exoplan Over coDiagnostiX? Exoplan integrates with exocad DentalCAD. If you already use exocad for restorations, Exoplan is the natural choice. The open architecture means no lock-in to specific implant brands.
Why Choose Exoplan Over BlueSky Plan? BlueSky Plan is free but less polished. Exoplan offers better libraries, faster processing, and professional support.
Frequently Asked Questions
Q1. What DICOM sources are compatible with Exoplan?
It accepts DICOM files from all major CBCT manufacturers including Sirona, Planmeca, Carestream, NewTom, Vatech, Morita, and others.
Q2. Does Exoplan require exocad DentalCAD to function?
No. It works as a standalone implant planning software. However, integration with DentalCAD enables prosthetic-driven planning using actual restoration STL files.
Q3. What implant libraries are included?
This software includes over 200 implant systems including Straumann, Zimmer Biomet, Camlog, Dentsply Sirona, Nobel Biocare, Bicon, MegaGen, Osstem, and many local manufacturers.
Q4. Can Exoplan design surgical guides for 3D printing?
Yes. It exports surgical guides as STL files compatible with any 3D printer or milling machine.
Q5. What is the cost of Exoplan?
It is available via annual subscription. Pricing varies by region and includes updates and support. Contact an exocad reseller for a quote.
Q6. Is there a free trial available?
Yes. Exocad offers a 30-day trial license for Exoplan. Contact an authorized reseller to request a trial.
Q7. What are the system requirements?
Windows 10 or 11 (64-bit), Intel Core i5 or better, 8GB RAM (16GB recommended), dedicated GPU with 2GB VRAM, 10GB disk space.
Q8. Can Exoplan be used for zygomatic implants?
Yes. It supports zygomatic implant planning with specialized workflows for extended implant lengths and angulations.
Q9. Does Exoplan support guided bone regeneration planning?
Basic bone graft planning is supported. For advanced bone graft simulation, dedicated software may be required.
Q10. What training is available?
Exocad offers instructor-led training, online courses, and certification programs through authorized resellers worldwide.
Final Thoughts
Exocad Exoplan V3.1 Build 2026 is the implant planning software of choice for exocad users and clinicians who value vendor neutrality. The open architecture means you are not locked into specific implant brands, scanner manufacturers, or 3D printer ecosystems.
The extensive implant library (200+ systems) means you can continue using your preferred implant brands. The software does not require you to change your clinical protocol.
For clinics already using exocad for restorations, it is the logical addition. For clinics evaluating implant planning software, its combination of power, flexibility, and reasonable cost makes it a top contender. The free trial allows testing on real cases. The learning investment pays off in faster, more predictable implant placements. Your patients deserve the best. Exoplan helps you deliver it.


